Build accurate science stories in 3D
Describe the biology and Animiotics builds an editable, cinematic 3D animation from real molecular structures. Refine it by hand in the browser, then render it in the cloud.
What’s new in this manual
Create animations from a description, find renders and 3D files in the Export tab, review the updated camera and timeline controls, and see the current plans, generations and Starter trial.
Getting Started
Sign in, watch the tutorial, then describe an animation or customize a starter.
Describe the animation you have in mind and Animiotics builds it as an editable 3D scene, or start from a finished example in the starter library.
- 1Sign in
Open Animiotics and sign in with Google, LinkedIn, or your email and password. A new email account asks for your first and last name and a password, then a code we email you; occupation and company are optional. Use the same account when returning to saved projects.
- 2Choose your starting point
Choose New Project, describe your animation on the Create tab and press Generate. Or open Starter library in the dashboard, preview an example and choose Customize this animation.
- 3Follow your animation
A new animation usually takes about an hour or more. You can close the tab while it works; its dashboard card shows the time left and then Ready.
- 4Make your first change
Open Objects and select an object, then try a color adjustment in Appearance or move it with the transform gizmo. When you are happy with it, open Export and choose Render animation.
Tutorial video
New accounts see a two-minute tutorial, How Animiotics works, on the dashboard. Reopen it any time with Watch tutorial.
Full editing works best on a desktop; on a phone you can create and review animations. Free accounts include two saved projects and 1 GB of storage. Creating with AI, exports and renders need a paid plan.
Starter Library
Preview scientific animations and open your own editable copy.
Open Starter library from the dashboard navigation. Select a thumbnail to preview the animation, then choose Customize this animation to create your own project. Browsing and watching previews do not create a project. On the Free plan, each copy counts as one of your two saved projects.
| Starter | Duration | Scientific context |
|---|---|---|
| The Smallest Delivery | 20 seconds | Scientifically informed, slowed-down kinesin transport. Molecular geometry, colors and timing are illustrative. |
| Axolotl limb regeneration | 52 seconds | Stage timings from Tank, Carlson & Connelly (1976) for adult axolotls at 21 °C. Cells are enlarged about four times and the cut-away is illustrative; the axolotl is modelled, not scanned. |
| Sandwich ELISA | 40 seconds | Antibodies from PDB 1IGT, the IL-6 antigen from PDB 1ALU and horseradish peroxidase from PDB 1ATJ, shown as surfaces traced from their coordinates. The molecules are not to scale with the plate, timing is compressed, and the plate, tubes and pipette are modelled. |
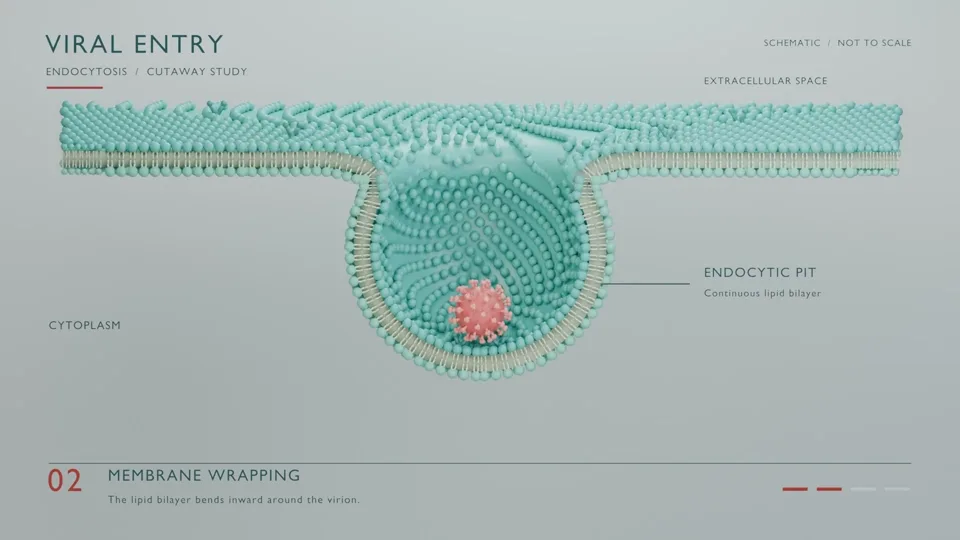
| Membrane invagination | 9 seconds | Conceptual endocytosis example. Structures and timing are not to scale. |
| Antibody receptor blockade | 10 seconds | Conceptual receptor blockade with stylized molecular models. Structures and timing are not to scale. |
| White blood cell phagocytosis | 10 seconds | A white blood cell engulfs a bacterium, then becomes transparent to reveal the internal vesicle. Colors and timing are illustrative. |
| Mitosis & daughter cells | 10 seconds | Illustrative animal-cell mitosis with six replicated chromosomes. Structures and timing are not to scale. |
| Heart valve & blood flow | 18 seconds | Illustrative aortic-valve cutaway with two pulses. Cell size and timing are exaggerated for visibility; flow is animated, not a measured simulation. |
| Heart failure pathophysiology | 59 seconds | Illustrative heart failure with reduced ejection fraction. The film follows a kidney-centered sequence; in heart failure, unloading of the arterial baroreceptors, not the kidney, is the main trigger of sympathetic activation. Anatomy is schematic, receptor structures come from PDB 8THL and 9L84, and on-screen values and timing are illustrative. |
| DNA hybridisation | 20 seconds | DNA geometry derived from PDB 1BNA. Hybridisation motion, colors and timing are illustrative. |
| Bisulfite Conversion | 55 seconds | Illustrative molecular reaction sequence. Molecular geometry, colors and timing are schematic. |
| Microscope & molecule | 10 seconds | A cinematic laboratory illustration featuring crambin (PDB 1CRN). |
| Eye & eye drops | 10 seconds | Conceptual eye-drop illustration. The visual change does not establish treatment efficacy. |
| Receptor-mediated endocytosis | 10 seconds | Conceptual receptor-mediated endocytosis. Structures and timing are not to scale. |
What you can customize
Your copy includes the scene objects, supported motion, camera, lighting and duration. Select objects or model parts, adjust appearance and composition, and review the result through the timeline, or describe a change in Create. Each customization creates an independent copy, so you can return to the library to start again.
Starter scenes illustrate scientific concepts. Check the example’s context, molecular identities, scale and timing before adapting it to a specific mechanism or claim.
Create & Render
Describe an animation, attach references, follow its progress and render your video.
Create builds an editable scientific animation from your description. Use the dock’s three tabs to move between creating, editing and reviewing output.
- 1Describe the animation in Create
Name the subject, scientific action, important structures and camera emphasis, then press Generate. For an existing animation, describe the specific change you want and press Make Edit. Each creation or edit uses one generation. Animations can be up to one minute long, and descriptions up to 3,000 characters for a new animation and 1,500 for an edit.
- 2Attach references
Use + to add reference photos (JPG, PNG or WebP), a molecular structure (PDB or mmCIF) or a publication (PDF, TXT or Markdown), up to five files. Explain what each should guide, and remove unwanted attachments before sending.
- 3Follow the current operation
A new animation usually takes about an hour or more, and you can close the tab while it works. Read the progress, the finish estimate and any request shown in the conversation. A generation can’t be stopped once it is sent: it continues until it ends, and you can send your next direction, or delete the animation, then. Scene editing is temporarily locked while changes are being prepared.
- 4Review in Objects
Wait for the scene to load, play Your video, then use Look around to inspect it. Adjust supported transforms, appearance and timing with the editor controls.
- 5Check references and versions
Open Export to see Creative direction, with its scientific sources and visual simplifications, your reference photos and Scene versions. Use Restore to return to an earlier version.
If a request doesn’t finish, its generation comes back to your account, up to twice each plan month. After that, a generation that doesn’t finish still counts, and Create tells you before you send.
Render a video or photo
In Export, choose Render animation to render your video in the cloud, or Render photo to choose a quality and frame for a still image. Your latest edits are saved before the render starts. Rendering needs a paid plan.
Export shows the render’s progress, the frames saved and an estimated time remaining. A render can’t be stopped once it starts. You can return to the editor or close the tab, and it continues in the background. Your account renders one animation at a time.
Download the finished video or photo when it is ready. Each render is kept with the project, so earlier versions stay available. Render again after edits when you need updated output. Your plan includes as many cloud renders a month as it has generations; renders that fail on our side don’t count.
Objects you add in the editor
Objects you add or import in the editor are not part of the animation until you choose Add objects to animation in Export. Before a video render, Animiotics asks whether to add them or render without them.
Saving and recovery
Watch the save status at the top of the dock: Saving…, Saved or Not saved. If saving or loading fails, use the Retry action shown in the editor. Undo and Redo are available for editor history; Restore in Scene versions provides another way to return to an earlier scene.
Editor Workspace
Find the Objects, Create and Export tabs, Add, Modeling, the inspector and timeline.
The viewport is surrounded by tools for adding content and editing the selected item. The dock on the right has three tabs: Objects for the object manager and inspector, Create for describing a new animation or a change, and Export for renders, 3D files, references and versions. Share and the save status sit at the top of the dock.
| Area | How to use it |
|---|---|
| Add | Search Models, add text or an image, open Shapes or Import, and add lights or particles. |
| Modeling | Open the modeling workspace for the selected compatible object. |
| Object manager | Select, rename, group, reorder, hide and duplicate scene objects. Expand imported models to inspect their parts. |
| Inspector | Use Transform, Appearance and the object-specific controls. With nothing selected, Scene, Lighting, Background and Particles control the overall view; Rendering appears for scenes you build by hand. |
| Timeline | In Your video, the video timeline plays and scrubs your animation and shows its sections and playback speed. In Look around, choose Show timeline to edit keyframes; drag its upper edge to change its height. |
| Profile menu | View your generations, open Profile settings and Documentation, or Send feedback. |
Make room for the scene
Resize the dock from its edge and move the divider between the object list and inspector. Drag the dock’s edge until it closes when you want a larger viewport, and click the edge to reopen it. Scroll or drag the inspector’s control strip when all its buttons do not fit.
Select before editing
Click an object in the viewport or its row in the object manager. The inspector changes with the selection; molecular controls appear for structures, while imported models expose their own parts and surfaces. Multi-selection supports shared transforms and organization.
Camera & Navigation
Switch views, orbit, pan, frame objects and compose your shot.
Your video and Look around
Your video follows the animation’s shot camera. Switch to Look around to orbit and inspect the scene; it starts where the film’s camera is. Return to Your video to review its framing. Exploring the scene does not itself rewrite the shot camera.
- Orbit: drag across the viewport, away from an editing handle.
- Pan: right-drag or hold Ctrl/Cmd while dragging.
- Zoom: use the mouse wheel or trackpad scroll.
- Frame: double-click an object to bring it into view. Press Alt + R, or choose Reset Camera in the right-click menu, to frame the whole scene.
- Projection: in Scene, open Camera and choose 3D or Flat under View Type.
Compose the output
For a scene you build by hand, choose a Video format (Landscape · 16:9, Phone · 9:16, Portrait · 4:5, Square · 1:1 or Landscape · 4K) and check the subject inside its frame. Leave space for labels and keep the important action visible throughout the timeline. Camera framing and depth of field affect the final composition as well as the viewport.
Focus and depth of field
Turn on Blur background in Scene, choose a focus object, then adjust Blur Amount and Focus Transition. This changes optical focus; double-click an object when you want to move the view closer to it.
Objects & Scene
Add scientific content, organize models and transform objects or parts.
Use Add → Search Models to browse biological models and molecular sources. The Add menu also contains text, images, 2D and 3D shapes, imports, lights and particles. Combine these with structures and reusable assets to build the shot.
Object organization
Use the object manager to rename items, drag them into order, group related structures and toggle visibility. Grouping helps move a working set together while retaining each object’s settings.
Imported model parts
Expand a model to reveal its part hierarchy. Select a part to edit its appearance or toggle its eye icon to hide it. A hidden parent also hides its children; show the parent before restoring an individual child. Return to Whole model in Appearance to edit the full object. Some parts of an animation made in Create belong to a larger surface and can’t be hidden on their own; select the object that contains them instead.
Unified transform gizmo
Select an object to reveal its move, rotate and scale handles. Hover a handle to identify it; the active handle turns orange. Use Transform in the inspector for exact numeric values.
- Move one axis: drag a red, green or blue arrow.
- Move two axes: drag a small gray circle between the axes.
- Rotate: drag a colored arc.
- Scale one axis: drag its outer colored dot. Hold Shift to snap the scale multiplier in 0.1 increments.
- Scale uniformly: drag a gray corner handle on the bounds.
Modeling & Sculpting
Edit points, surfaces and parts, sculpt geometry, and shape membranes.
Select a compatible object and choose Modeling in the toolbar. Available controls depend on whether you selected a model, shape, cell or membrane.
Mesh editing
- 1Choose a selection
Use Point, Surface or Part selection for the geometry you want to change. X-ray helps select through the visible surface.
- 2Transform the selection
Choose move, rotate or scale, then set the transform space and pivot. Enable proportional editing to influence nearby geometry and adjust its radius and falloff.
- 3Refine the form
Use the available deformation, separation and surface controls. Shape detail changes the editable geometry on supported shapes; Shade smooth changes how the surface is lit.
- 4Review and exit
Inspect the result from several angles. Use Undo for a recent edit or Reset deformation to clear the deformation, then exit Modeling to return to scene editing.
Sculpt brushes
For supported models and shapes, choose Draw, Smooth, Inflate, Flatten, Pinch or Carve. Adjust brush radius and strength, then stroke the surface. Use a small strength for controlled changes and inspect the silhouette as you work.
Cells and membranes
Invagination controls shape an inward or outward deformation. Set its direction, center where available, radius, depth, rim and weight; membranes also expose neck controls. Keyframe supported values when the deformation needs to change over time.
Animating mesh edits
Use Animate mesh when it is available for your selection to keyframe deformation. Review the complete animation after changing geometry, especially when the model already contains imported motion.
Imports & Molecular Data
Upload structures, molecular trajectories, GLB or FBX models and images.
Open Add → Import and choose the upload type. For searchable sources, open Add → Search Models instead. To guide a new animation with your own structure or paper, attach it in Create.
| Input | Where and what to upload |
|---|---|
| Molecular structures | Upload Structure accepts PDB, CIF/mmCIF, ENT and SDF files. RCSB PDB and AlphaFold structures can also be found through model search. |
| 3D models | Upload Model accepts GLB and FBX. Package textures inside the file; FBX textures must also be decodable by the browser. |
| Images | Add → Image accepts PNG, JPG/JPEG and WebP for image panels in the scene. |
| Molecular trajectories | Upload MD Trajectory accepts supported single-file trajectories or a structure paired with an XTC trajectory. |
Molecular dynamics trajectories
Single-file formats include XYZ, EXTXYZ, TRAJ, XDATCAR, H5/HDF5 and multi-model PDB/ENT, with supported gzip variants. Paired imports use one PDB/mmCIF structure and one XTC trajectory. Choose matching files from the same molecular system.
The importer limits raw trajectories to 500 MB and samples at most 2,000 frames. Playback follows the timeline playhead and speed. Trajectory display uses atom and bond representations rather than cartoons or molecular surfaces.
After import
Check orientation, scale, textures and any animation clips. Compatible clips are retained from imported models. GLB keeps the model’s geometry, materials and textures in one file; a separate .gltf file is not accepted by Upload Model.
Protein Visualization
Choose molecular representations, atom styles and colors.
Select a molecular structure and open Appearance. Show or hide Atoms, Cartoons and Surfaces to describe structure at different levels of detail.
| Representation | What it shows |
|---|---|
| Atoms | Atoms and bonds for close inspection of molecular detail. Choose the Stick, Sphere (space-filling) or Ball + Stick style. |
| Cartoons | Helices, sheets and loops that reveal the overall fold. |
| Surfaces | The molecular envelope, optionally combined with atoms or cartoons. |
Color schemes
Under Coloring, choose Element for atom types, Chain to separate molecular chains, Nucleotide for DNA/RNA, or Polymer for polymer categories.
Readable molecular scenes
For dense structures, begin with cartoons and add atom or surface detail only where needed. Keep the active site or binding region distinct from supporting structure. Verify chain identity, ligands and the intended structure state against your source data.
Materials & Lighting
Edit whole-model or part appearance, surfaces, lighting and rendering quality.
Appearance by model, part or surface
Select a model and open Appearance. Choose All surfaces to change the full selection, or pick a surface for a narrower edit. Selecting a part in the object manager limits the controls to that part.
Mixed colors means the selection contains several colors. Choosing a color applies it across the selected surfaces. Imported colors may come from a texture or vertex colors; replacing them with a solid color changes that original look. Use Reset to restore the original appearance for the active scope.
| Control | Effect |
|---|---|
| Color | Choose a color swatch or enter a hexadecimal color value. |
| Roughness | Move between a smooth reflective finish and a matte surface. |
| Metallic | Adjust the metallic response, or choose a Matte, Satin, Glossy or Metal finish. |
| Surface opacity | Adjust transparency for the selected surface or part. |
| Finish | On shapes, choose a glass, organic, plastic or water finish. |
In an animation made in Create, appearance edits are saved into the animation’s own materials. Some surfaces can’t take every color or finish change, and Appearance says so.
Lighting, background and particles
Use Lighting for scene illumination, environment and shadows. Add a light from the Add menu when the subject needs more separation. Background controls the scene backdrop; Particles controls the particle field. Keep these effects subordinate to the scientific action.
Rendering quality
For a scene you build by hand, the Rendering inspector controls viewport quality and supported visual effects. Higher detail, shadows and depth of field can slow interaction. Reduce those settings while editing complex scenes, then review the finished look before export. An animation made in Create is rendered in the cloud, so it has no Rendering inspector.
Animation & Timeline
Scrub, play and edit transform, property and imported animation tracks.
In Your video, the video timeline plays and scrubs your animation, shows its named sections and offers a playback speed. Switch to Look around and choose Show timeline to edit keyframes.
- 1Set up the timeline
Open the timeline and choose the scene duration. Scrub the playhead to the first moment you want to edit.
- 2Set a starting value
Select an object and use the keyframe button beside a supported property to record its value at the current time.
- 3Create the change
Move the playhead, change the value and set the next keyframe. Position, rotation, scale and supported numeric properties can be animated.
- 4Review the motion
Play the sequence, adjust keyframe timing and easing, then inspect the first and last frames for jumps.
Editing tracks
Move, copy, paste and delete selected keyframes in the timeline. Enable snapping when aligning their times. Keyframe shortcuts act on timeline selection when the timeline has focus; object shortcuts act on the scene otherwise.
Scrub to the intended time before adjusting an animated object and review its keyframes after editing. Imported model clips, molecular trajectories and semantic events also follow the scene timeline.
Editing an animation made in Create
Editing a transform records the change at the playhead while preserving the surrounding motion. A later key you set can constrain how that change blends into the animation. Your keys appear on the video timeline: drag them, use the arrow keys to nudge them one frame (Shift for ten), or right-click to choose Linear, Bézier, Ease In or Ease Out, or to delete a key. Only transform keys are saved for the animation’s own objects. Animations can be up to one minute long.
Playback
Press Space to play or pause outside text fields. Use the speed control to inspect motion more slowly or quickly; playback speed is a review control. Set duration and authored timing to change the actual sequence.
Semantic Events
Author biological actions such as binding, insertion and diffusion.
Semantic events describe an action over a time interval. In Look around, open the timeline and choose Animation, choose the participating objects, configure the action and inspect its motion on the timeline. The panel also offers motion styles such as Float, Rotate, Drift, Pulse, Sway and Replicate, and Fade In or Fade Out.
| Event | Purpose |
|---|---|
| Bind | Move a source toward a target point. |
| Insert | Move an object into a membrane or surface. |
| Cleave | Illustrate a separation event. |
| Diffuse | Create repeatable Brownian-style motion over an interval. |
| Vibrate | Add a rapid shaking motion over an interval. |
Target points
Choose the source and target, use Pick target point to place a point on the target surface, then adjust the event interval. Inspect the contact point from several angles and play through the full approach and release.
These tools help author explanatory motion for objects you add in the editor; events are not saved for the objects of an animation made in Create. Validate the binding site, mechanism and relative timing against the science you intend to communicate.
Physics
Configure rigid bodies, collisions and simulation playback.
Use the selected object’s physics controls to configure collision behavior before running a simulation. Dynamic bodies respond to gravity and collisions; static bodies provide fixed obstacles. Physics is available for models and sphere, cube and rectangle shapes you add in the editor, not for the objects of an animation made in Create.
- Set mass and restitution to control inertia and bounce.
- Adjust friction, damping and the collision margin so contact looks right without unnecessary complexity.
- Check the starting placement so objects do not begin inside each other.
- Review the simulated result alongside authored animation and camera movement.
Export & Sharing
Render or export photos, video, GLB and 3MF/STL, or create a read-only share link.
Open Export in the dock and choose the output you need. Exports and renders need a paid plan; every paid plan exports up to 4K without a watermark. In an animation made in Create, video and photos are rendered in the cloud (see Create & Render) and 3D files are under 3D scene.
| Output | How to use it |
|---|---|
| Export Photo / PNG | Save the current view as a lossless still image for a figure, slide or poster. |
| Export Video / MP4 | Record a scene you build by hand at the size of its Video format. If your browser cannot encode MP4, the video is saved as WebM. |
| Export Scene / GLB | Export the whole scene as binary glTF for another 3D application. |
| Export Selected / GLB | Select objects first, then export only that selection. |
| 3D Print Selected / 3MF or STL | Select geometry, choose 3MF, STL or STL parts, set its physical size and orientation, and inspect the result in a slicer before printing. |
| Share | Copy a link to a read-only 3D view of your scene. Anyone with the link can open it without signing in. |
Before starting
Wait for saving and asset uploads to finish, check the complete timeline and confirm the output frame. Keep the browser open during browser video export. Use Cancel Export if you need to stop it.
After exporting
Open the actual output to check camera framing, duration, colors, labels and motion. GLB carries supported 3D content; browser effects and scientific or procedural behavior may not transfer exactly to another application. 3MF and STL files contain printable geometry, not the animation.
Share links
Use Share when someone needs to explore the scene interactively. The link shows the scene as it is when you share it. Treat the link as access to the shared content and check the viewer before sending it. Links shared from a free account show an Animiotics watermark on desktop. Render a video instead when you need viewers to see one fixed sequence and camera.
Projects, Saving & Recovery
Manage dashboard projects, monitor saving and resolve conflicts.
Manage dashboard projects
Open a project card to continue editing. While an animation is generating, its card shows the time left and then Ready. Its Project menu offers Open in new tab, Rename and Delete. Deletion asks you to confirm; an animation can be deleted once it has finished generating. Use the account menu to open Notifications, Generations and Settings.
Saved projects and local backups
Account projects save their scene documents and uploaded assets to Animiotics. Autosave checks the project revision so a second session cannot silently overwrite newer work. The editor also keeps a browser backup for recovery during temporary connection problems.
A browser backup belongs to that browser and device. It does not confirm that your latest edits are available on another device. Wait for successful saving before closing a project or switching computers.
When saving pauses
A connection failure, expired session or newer project version can pause remote autosave. Read the warning and keep the editor open while you reconnect. Avoid clearing browser storage while recovering unsaved changes.
Revision conflicts
If a scene you build by hand changed elsewhere, the editor protects your local scene and pauses remote saving. Choose Keep local scene or Use server scene after checking which version you intend to keep.
Plans, Generations & Billing
Understand plans, generations, the Starter trial, renders and subscriptions.
Your account and existing subscription
Open Settings from the dashboard account menu, or Profile settings in the editor, to check your plan under Subscription. Manage Payment Methods and View Invoices open the Stripe billing portal. Use Cancel subscription under Payment Methods to cancel.
Plans and generations
The Pricing page presents Academic and Industry plans with monthly and annual billing. One generation creates a new animation or edits an existing one with AI; manual editing is always free. Generations refresh monthly on every plan, including annual ones, and don’t roll over. Prices here are in US dollars; the Pricing page shows the price for your location.
| Plan | Price | Generations and storage |
|---|---|---|
| Free | No card needed | The manual editor and starter animations, with two saved projects and 1 GB of storage. AI generation, exports and renders need a paid plan. |
| Academic Starter | $19 a month, or $15 a month billed yearly | 6 generations a month · 5 GB storage |
| Academic Plus | $49 a month, or $39 a month billed yearly | 18 generations a month · 25 GB storage |
| Academic Studio | $99, $179 or $249 a month, or $79, $143 or $199 a month billed yearly | 40, 80 or 120 generations a month · 100 GB storage |
| Industry Solo | $99 a month, or $79 a month billed yearly | 20 generations a month for one seat · 100 GB storage |
| Industry Team | $149 per seat a month, or $119 per seat billed yearly · 2 to 9 seats | 42 generations per seat, shared by the team · 100 GB storage |
| Industry Scale | $349 per seat a month, or $279 per seat billed yearly · 5 to 15 seats | 176 generations per seat, shared by the team · 500 GB storage |
| Enterprise | Let’s talk | A generation allowance and commercial licensing agreed for your organization. |
Solo, Team and Scale include a commercial-use license for the animations you create. Team and Scale seats share one monthly allowance, and every account runs one generation at a time. Paying from a grant or an institution? Choose Pay by invoice or purchase order on the Pricing page; your generations start when the invoice is paid.
Try Starter for $2.99
New accounts can try Starter on monthly billing: pay $2.99 for 7 days and your first animation. Do nothing and on day 7 Starter starts at $16.01 for 5 more animations, so your first month is $19 in total; then it continues at $19 a month for 6 animations. Cancel within the first 7 days and you only pay $2.99. One trial per person. During the trial, Continue my plan starts Starter early.
Generations in the editor
Open the profile menu to view Generations and, when available, your Monthly allowance. Get generations opens plan options without leaving your scene. If the balance is unavailable, use Refresh balance; unavailable does not mean zero.
Each AI creation or edit uses one generation. On a free account, Generate opens the plans, starting with the first-animation offer for new accounts. When a paid plan has none left, a message says so and shows the plans. Viewing a plan does not add generations automatically. If a generation doesn’t finish, it comes back to your account, up to twice each plan month.
Renders and limits
Your plan includes as many cloud renders a month as it has generations, and one animation renders at a time. Animations can be up to one minute long, and descriptions up to 3,000 characters for a new animation and 1,500 for an edit. Paid plans export up to 4K without a watermark.
Custom Animation Services
Work with the Animiotics team on a scientific film or campaign.
Visit Custom Animation Studio to commission a scientific film with the Animiotics team. Bring your papers, product information, presentation or initial idea and use the enquiry form to describe your project.
- 1Share the science
Describe the audience, mechanism, intended use and deadline. Include the scientific material the team should work from.
- 2Review the story
Work with the team on the brief, script, storyboard and timed animatic before production.
- 3Refine the film
Review the models, animation and visual direction with your scientific team. Confirm deliverables and review rounds for your chosen scope.
The services page includes Motion Study, Signature Explainer and Campaign System packages, case studies and an enquiry form. This is a commissioned production service; to make an animation yourself, describe it in Create.
Done for you
For a short animation made for you in Animiotics, choose Send your brief under Done for you on the Pricing page: from $999, up to 30 seconds in 1080p, delivered within 5 working days with one revision round. The brief is confirmed before you pay.
Keyboard Shortcuts
Use scene, timeline and documentation keyboard controls.
Use these controls while working in the editor. Text fields, dialogs, timeline selection and browser shortcuts can change which action receives a key. While a scene is being prepared, editing shortcuts wait until it is ready.
| Action | Shortcut |
|---|---|
| Play or pause | Space |
| Undo | Ctrl/Cmd + Z |
| Redo | Ctrl/Cmd + Y or Ctrl/Cmd + Shift + Z |
| Copy / paste objects or selected timeline keys | Ctrl/Cmd + C / V |
| Select all scene objects | Ctrl/Cmd + A, outside the timeline |
| Delete selected objects or timeline keys | Delete or Backspace |
| Hide a selected model part | Delete, Backspace or X |
| Clear the selection or cancel a drag | Escape |
| Return to Select and close modeling / timeline | Q |
| Hide or show editor UI | Ctrl/Cmd + \ |
| Toggle fullscreen | Ctrl/Cmd + Shift + F |
| Reset camera | Alt + R |
In this manual
Press / to focus documentation search on desktop. Type a topic and press Enter to open the first matching chapter. Escape clears search and closes the mobile chapter menu. Chapter links can be bookmarked using their address hash.
System Requirements
Check browser graphics, desktop editing, video encoding and connectivity.
Browser and graphics
The interactive editor requires WebGL2 and hardware acceleration. Use a desktop browser with WebGL2 enabled. If the 3D view does not start, turn on hardware acceleration in the browser settings, restart the browser and reload. Browser media support also determines whether direct MP4 export is available.
Device and scene complexity
Full authoring is designed for desktop screens with a mouse or trackpad. Phones can create and review animations in the focused interface described below, and view shared scenes. Large molecular structures, dense geometry, surfaces, shadows and particles need more graphics memory and processing power.
On a phone
On a phone, the editor opens with two tabs.
- AI Maker: describe an animation, attach reference photos and follow progress. Tap Generate to send; Enter adds a new line. Your unsent text and photos stay in place when you switch tabs.
- Viewer: switch between Your video for the composed camera view and Look around to inspect the scene. Use Reset view to reset the inspection view. Your video includes play, scrub and playback speed controls.
- Share and Export: these actions become available once the scene has loaded. Export lets you download the last render, render the animation or a photo, or save the 3D scene as a GLB file. Active operations can temporarily disable these actions.
The desktop reminder can be dismissed with its close button. Full object editing and timeline authoring remain desktop tools.
Video encoding
Animations made in Create are rendered in the cloud as MP4. When you export a scene you build by hand, MP4 uses the browser’s available encoding capabilities; if the required codec is unavailable, the video is saved as WebM. Check that it plays in your destination application.
Connectivity
Sign-in, uploads, account project saving, creating, rendering, share links and billing need a working connection. The viewport renders on your device after the scene’s assets have loaded. A loaded scene alone does not guarantee that unsaved edits have reached your account.
FAQ & Troubleshooting
Resolve starter, model, save, export, render, account and preview issues.
Where did my starter go?
Open Starter library from the dashboard navigation to preview it again. Customize this animation creates a new project; open your saved project card to continue an existing customization. On the Free plan, each copy counts as one of your two saved projects.
Why does the scene look different from the preview video?
The starter video is a finished render. Browser materials and lighting can look different, particularly with procedural colors, reflections and fine surface effects. The viewport is a real-time preview; render your animation in Export to see the full-quality result.
Why did changing a color affect several parts?
Check the scope in Appearance. All surfaces applies to the whole selection. Choose a part or a single surface for a narrower edit; use Reset to restore its original appearance.
Why is a model part missing?
Expand the model’s part tree and check visibility for the part and its parents. Delete hides a selected part, so showing it again can recover it. Also scrub the timeline: some objects appear only later in an animation.
Why is an animated object moving back after my edit?
Its animation can control the transform at the current time. In an animation made in Create, moving an object records a key at the playhead, and a later key you set can pull it back: adjust or delete that key on the video timeline. In a scene you build by hand, pause playback, move to the intended time and inspect the object’s keys before editing.
Why is saving paused?
Check the save status or warning for a lost connection, expired session or conflicting project version. In an animation made in Create, press Retry, or reload if it was edited in another tab. Keep the editor open while resolving it and wait for a successful save before leaving. See Projects, Saving & Recovery for the available conflict choices.
Why is a large scene slow?
Hide objects you are not working on and use simpler molecular representations. In a scene you build by hand, also reduce viewport quality and effects in Rendering. Add surfaces and atomic detail only where they help explain the shot.
Why can’t I export a selected model?
Select at least one object. Exports need a paid plan. Allow an in-progress export to finish or cancel it before starting another.
Can I stop a generation or a render?
No. Once sent, a generation continues until it ends, and a render can’t be stopped once it starts. You can close the tab; both continue in the background.
Why can’t I start a render?
Rendering needs a paid plan and a verified email. Your plan includes as many renders a month as it has generations, and one animation renders at a time, so wait for another render to finish first.
Why is my generation balance unavailable?
Check that you are signed in and use Refresh balance in the profile menu. An unavailable balance is a loading or connection state, not a confirmed empty balance.
How do I report a problem?
Use Contact support on the dashboard, or Send feedback in the editor’s profile menu. Include the project name, the action that failed, when it happened and the exact warning. A short sequence of steps makes the issue easier to reproduce.